REVIEW · SEATTLE
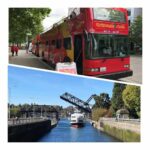
From Seattle: Mt Saint Helen Tour
Book on GetYourGuide →Operated by PLATFORMPOINTS LLC · Bookable on GetYourGuide
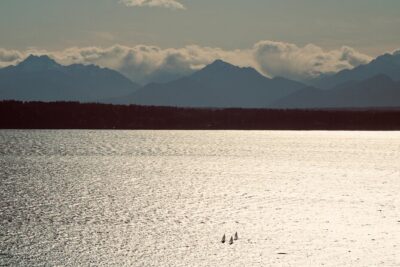
A volcano story told in real time. You’ll get geology-focused viewpoints plus a guided walk through the 1980 blast zone’s scars and regrowth, highlighted at Johnston Ridge Observatory. One thing to plan for: it’s a long day and lunch isn’t included.
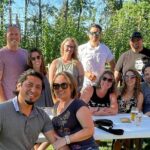
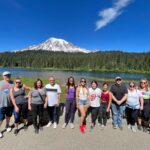
I like how this trip mixes big scenery with real explanation, not just photos from a bus window. The group stays small (up to 14), and you’ll travel with an English-speaking guide from a Seattle pickup with bottled water included.
Timing matters because Johnston Ridge Observatory is open seasonally. Still, even when hours change, the core idea stays the same: learn what happened, then see how the area is healing.
In This Review
- Key Points You’ll Care About
- Why This Seattle-to-Mount St. Helens Tour Feels Like Good Value
- Getting Out of Seattle: The 4 Hours That Set the Tone
- Mount St. Helens Stop: Seeing the Aftermath With Context
- Coldwater Ridge Visitor Center: A Guided Start That Helps You Look Better
- Johnston Ridge Observatory: The Moment the Story Clicks
- Coldwater Lake: Reforestation You Can Actually Relate To
- What You’ll Learn Beyond the Views (and How to Get More Out of It)
- Price and Logistics: The Real Cost Trade-Offs
- Practical Tips for a 9-Hour Volcano Day
- Should You Book This Mount St. Helens Tour From Seattle?
- FAQ
- FAQ
- What is the pickup location for the Mt. St. Helens tour?
- How long is the tour?
- What stops are included during the day?
- Is lunch included?
- Is water included?
- What group size is this tour?
- Can I cancel for a full refund?
Key Points You’ll Care About
- A small group (up to 14) that keeps questions possible during the stops
- Johnston Ridge Observatory on Johnston Ridge, in the 1980 blast zone
- Coldwater Ridge Visitor Center offers a guided start with natural and local history
- Reforestation and wildlife context you can actually see as you move through the area
- Long viewing time at Johnston Ridge (about 4 hours) gives you room to read signs and ask questions
Why This Seattle-to-Mount St. Helens Tour Feels Like Good Value
For $285 per person, you’re paying for two things you can’t easily replicate on your own: guided interpretation and all-day transportation from Seattle. A day trip to Mount St. Helens can become a lot of drive-and-guess if you’re trying to self-navigate every viewpoint, visitor stop, and time window.
This tour keeps the pace practical. You’ll have a live guide for the key learning stops, not just a narration over speakers. And since the group is limited to 14, the day tends to feel more like a lesson with a driver than a cattle-car sightseeing loop.
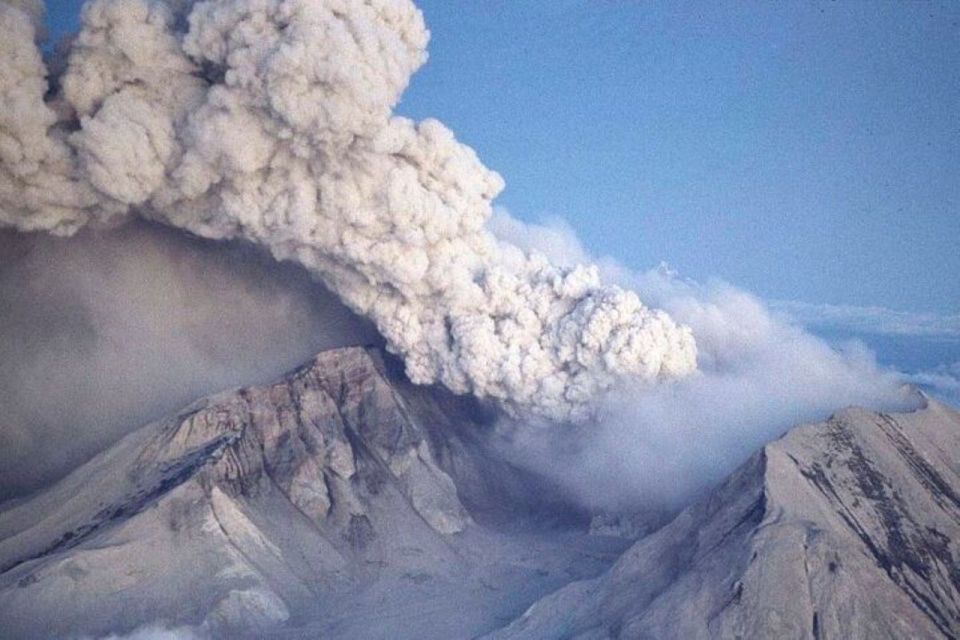
The “why” matters here. Mount St. Helens isn’t only a landmark name. It’s a place where geography changed fast during the events leading up to the 1980 eruption, and where the aftermath is still visible. The trip is built around seeing that change, then connecting it to what’s growing there now.
You can also read our reviews of more tours and experiences in Seattle.

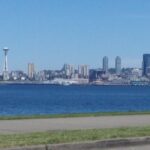
Getting Out of Seattle: The 4 Hours That Set the Tone
Your day starts with pickup in Seattle, then you head out for the main scenic drive portion, around 4 hours total as you approach the volcano area and make the Mount St. Helens stop. That drive time is not filler. It’s the prep period where your guide can start framing what you’re about to see.
I like this structure because it keeps your eyes open. Instead of arriving and immediately feeling overwhelmed, you get the context first: what the 1980 eruption did to the mountain’s shape and what it means to stand in a landscape shaped by that kind of force.
If you’re the type who likes asking questions, this part helps too. You’ll often get first answers before you hit the most important viewpoints, when you still have energy to look closely.
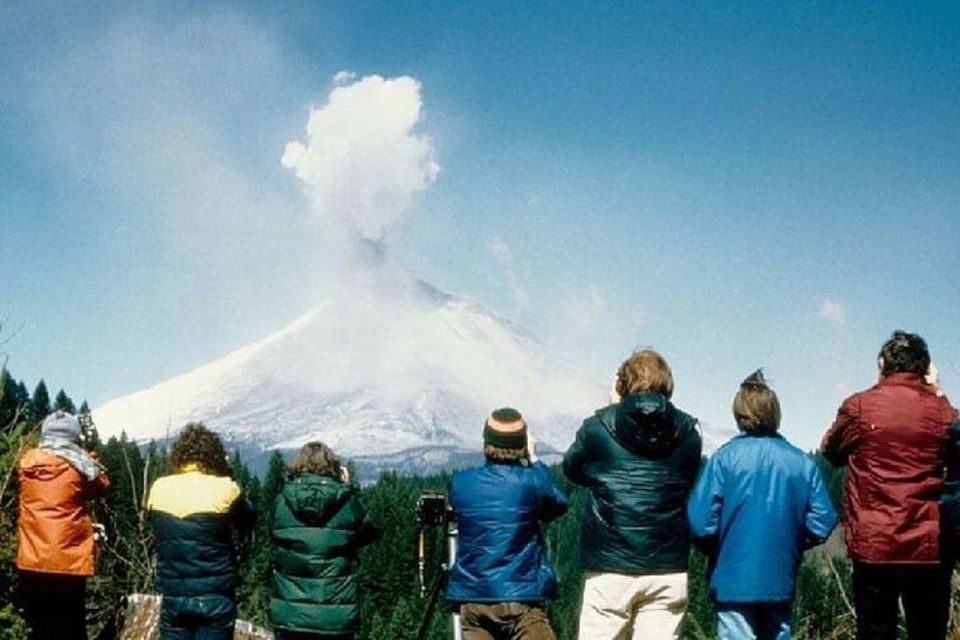
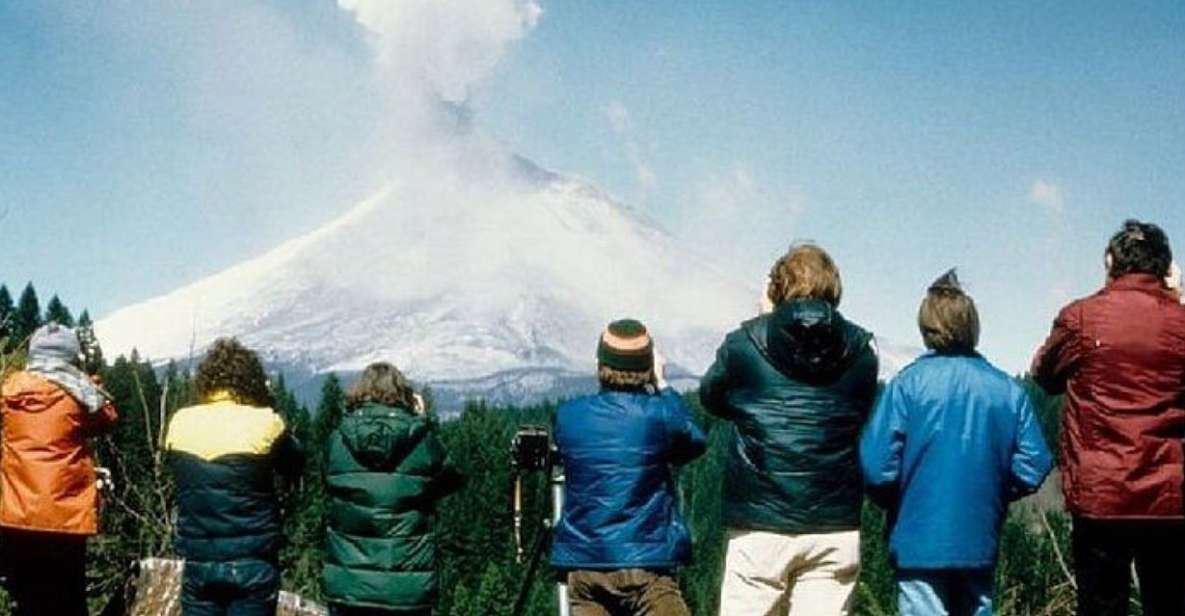
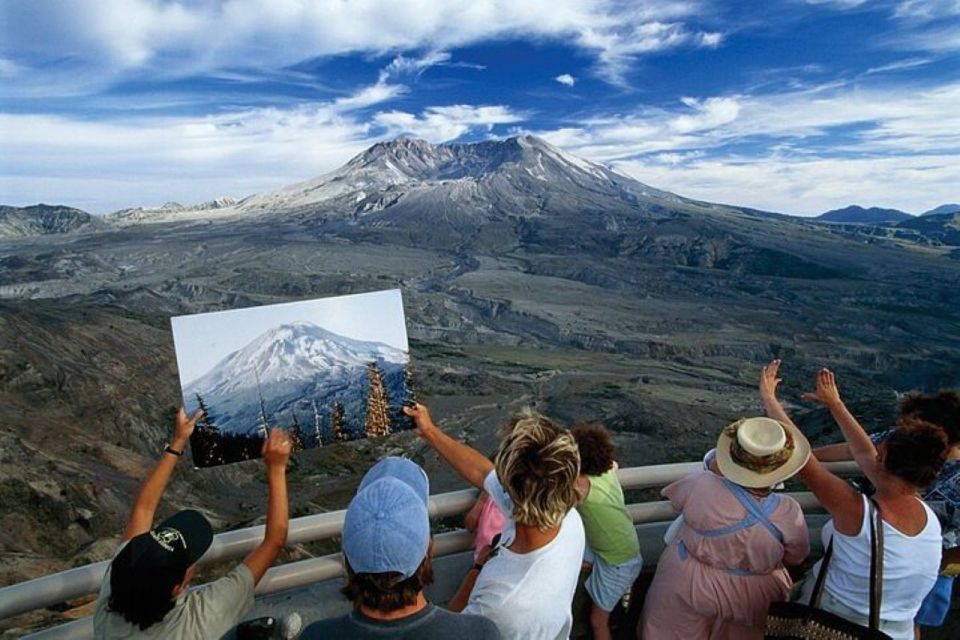
Mount St. Helens Stop: Seeing the Aftermath With Context
At Mount St. Helens, you’ll have time for visiting and scenic views, tied to the bigger story of a volcano whose topography was permanently changed. This isn’t just about “there it is.” It’s about learning how the area got remade, and why the region looks the way it does today.
This is also where you’ll start picking up the difference between what you see at a distance and what you can understand with a guide. You might spot clues in the shape of the terrain and the ways new growth has taken hold, but the guide helps you read those clues as evidence, not decoration.
One practical note: wear layers. Even when Seattle feels mild, volcanic regions can shift quickly in temperature, and you’ll spend time outside for viewpoints.
Coldwater Ridge Visitor Center: A Guided Start That Helps You Look Better
Next comes Coldwater Ridge Visitor Center, where you’ll get a guided tour and sightseeing for about 1 hour. This is an important early stop because it gives you language for what you’ll later see at Johnston Ridge.
Think of it as your field-lesson briefing. You’ll learn local and natural history, and you’ll connect the eruption narrative to the kinds of flora and wildlife you may see as you keep moving through the area. That matters because reforestation isn’t a single moment. It’s a long process, and seeing it in stages helps you notice details you’d otherwise miss.
A small group also helps here. In a room full of signs and maps, it’s easier to ask something specific—like what you should focus on from the next overlook—when you’re not fighting a crowd.
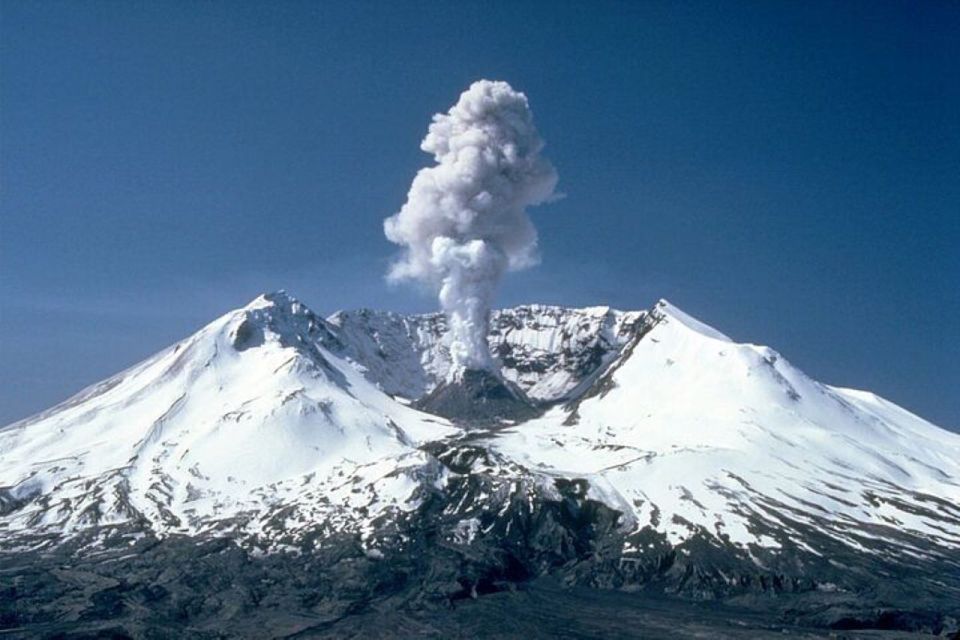
Johnston Ridge Observatory: The Moment the Story Clicks
Johnston Ridge Observatory is the centerpiece: about 4 hours at Johnston Ridge in the center of the 1980 blast zone, roughly 8 km (5 mi) north of the summit. The building houses seismic, deformation, and other monitoring equipment that relays data to the USGS Cascades Volcano Observatory for analysis.
Here’s what makes this stop special in a real, practical way: you’re not only looking at the results of a past eruption. You’re seeing how scientists keep watching for the next chapter. The observatory connects the emotional weight of 1980 to the everyday work of monitoring and interpretation.
You’ll also hear the story behind the name. Johnston Ridge was named for David Johnston, a USGS volcanologist who was on duty during the May 18, 1980 eruption at the USGS Coldwater II observation point. He was one of 57 people who lost their lives in the eruption.
That context adds depth to what would otherwise be a viewpoint. Instead of just thinking, this is dramatic, you start thinking, this is a place that changed science, safety, and how monitoring works.
I’m also a fan of the generous time here. Four hours is enough to read what you want, step away when you need a breath of air, and re-approach with better questions. If you get a guide with a patient rhythm—people like Bob and Chad come up for being accommodating and explanation-friendly—you’ll make the most of the signs without feeling rushed.

Coldwater Lake: Reforestation You Can Actually Relate To
After Johnston Ridge, you’ll head to Coldwater Lake for about 1 hour with a guided visit and sightseeing. This stop shifts the emotional tone a bit. Instead of focusing only on rupture and aftermath, you get a clearer sense of renewal.
The tour is explicitly framed around the distinct volcano and the flora and wildlife that contribute to the remarkable reforestation initiative. Even if your focus is geology, this is where the natural history becomes concrete. You can look around and think about how quickly nature finds ways to return, and how the terrain supports that comeback.
The biggest benefit here is perspective. When you’ve spent time near the blast zone’s most powerful reminders, you’ll be ready to notice smaller changes—things you’d overlook if you were only on the lookout for the biggest views.
Bring binoculars if you have them, but don’t stress if you don’t. Your guide’s job is to help you focus on what matters, not just on what’s visible from far away.
What You’ll Learn Beyond the Views (and How to Get More Out of It)
This tour is built around local and natural history plus geological sightseeing, which means you’ll leave with more than photos. You’ll start connecting the eruption’s impact to what you can observe afterward—how the land was altered, and how living systems return over time.
Here’s how to get extra value from your guide while you’re outside:
- Ask one question per stop that starts with what you should look for next.
- Read the signs, then ask what changed because of the 1980 events.
- If you’re more into geology, focus your questions on terrain and monitoring; if you’re more into nature, focus on recovery and wildlife context.
The best guides on this kind of route tend to match your pace. In the small-group setting, guides like Bob and Chad are described as patient and accommodating, even when you want time to read and then ask follow-ups. That makes the tour feel like collaboration instead of a checklist.
Price and Logistics: The Real Cost Trade-Offs
At $285 per person for a 9-hour day, you’re paying for convenience plus interpretation. The trade-off is that you’re not going to get a leisurely, no-rush vacation day. You’re on a schedule, and you will be outside for viewpoints.
Lunch not included is the main cost you’ll need to plan for. Bottled water is included, which helps, but you’ll still want to eat before or after in a way that keeps you comfortable on the road home. If you hate being hungry, plan ahead so the learning time doesn’t get undercut by low energy.
The small group is part of the value. With a maximum of 14 participants, you’re more likely to get answers tailored to what you’re actually noticing, especially at Johnston Ridge where the background information is heavy and useful.
Practical Tips for a 9-Hour Volcano Day
A long day in the field needs simple preparation:
- Wear layers and bring a light rain shell if you have one. Conditions can shift.
- Wear shoes with good grip for walking around visitor-area paths.
- Bring your own snacks if you want to avoid stress around meals. Lunch is not included.
- Expect a lot of outside time at scenic stops and observatory viewpoints.
One limitation to keep in mind: the tour is not suitable for wheelchair users. If mobility support is needed, you’ll want to confirm alternatives before booking.
Also, because Johnston Ridge Observatory is open seasonally, double-check your travel dates so you’re not guessing.
Should You Book This Mount St. Helens Tour From Seattle?
If you want a guided day that explains what you’re seeing—without turning your trip into a self-driving scavenger hunt—this is a strong pick. The itinerary concentrates your time where the story is most tangible: Coldwater Ridge for guided context, Johnston Ridge for monitoring and the David Johnston connection, then Coldwater Lake for recovery in action.
I’d skip it if you hate long days, if you want long independent exploration with minimal structure, or if you need wheelchair accessibility. And if you’re the kind of person who forgets snacks until you’re cranky, plan your meals early since lunch isn’t included.
If those trade-offs fit your style, book it. You’re paying for a tight, thoughtful route and a guide who helps you read the mountain like a living classroom.
FAQ
FAQ
What is the pickup location for the Mt. St. Helens tour?
The tour pickup location is Seattle, and you’ll return back to Seattle at the end.
How long is the tour?
The tour duration is 9 hours.
What stops are included during the day?
You’ll visit Mount St. Helens for views, stop at Coldwater Ridge Visitor Center for a guided tour, spend time at Johnston Ridge Observatory for sightseeing, and visit Coldwater Lake.
Is lunch included?
No. Lunch is not included.
Is water included?
Yes. Bottled water is included.
What group size is this tour?
It’s a small group limited to 14 participants.
Can I cancel for a full refund?
Yes. You can cancel up to 24 hours in advance for a full refund.