REVIEW · SEATTLE
Mount Baker Climb Tour from Washington
Book on Viator →Operated by Miyar Adventures, LLC · Bookable on Viator
Mount Baker has a way of teaching fast. This 3-day climb pairs professional guidance with all the gear and permits handled, so you can focus on learning glacier travel the right way. Guides such as Simon, Josh, Drew, and Caleb are repeatedly praised for calm, safety-first decision-making on a big mountain.
What I like most is the hands-on training: ice axe arrest, crampons, rope teamwork, route finding, and even cold-weather camping skills before any summit push. The group size cap of 15 keeps things controlled without turning it into a classroom circus.
One heads-up: meals and hot drinks aren’t included, and weather may force a turnaround or shift the summit day. You’ll want to pack smart for cold nights and stay flexible.
In This Review
- Key Things That Make This Mount Baker Climb Worth Your Time
- Why This 3-Day Mount Baker Climb Feels Like Real Mountaineering Class
- Easton Glacier vs Coleman-Demming: Pick Your Route and Expect Icefall Work
- Seattle Morning Logistics: What the Early Start Really Means
- What’s Included (and Why It’s Better Than You Think)
- Skills You’ll Practice: Self-Arrest, Crampons, Rope Management, and Knots
- The Summit Window: Icefalls, Seracs, and the Safety Calls That Matter
- Camping in the Cold: What You Should Expect and How to Prepare
- Gear Checks and Packing Balance: The Practical Secret to Not Suffering
- Who This Tour Suits Best (and Who Should Think Twice)
- Price and Value: What You’re Paying For (Without the Sticker Shock)
- Should You Book This Mount Baker Climb?
- FAQ
- How long is the Mount Baker climb tour?
- Which routes does the tour use on Mount Baker?
- What skills are included during the climb?
- What’s included in the price?
- What isn’t included?
- What’s the maximum group size?
- What happens if weather changes during the trip?
Key Things That Make This Mount Baker Climb Worth Your Time
- Permits are included, which removes one more friction point for planning a summit trip
- All equipment and tents are included, so you’re not shopping for glacier gear you’ll use once
- Small groups (max 15) help the guide keep close tabs on rope teams and footwork
- Easton Glacier or Coleman-Demming gives you a real mountaineering challenge, not just a hike
- Skill practice is explicit: self-arrest, crampons, rope management, knots, hazard assessment
- Weather flexibility is built in: summit timing can shift and you may get a more relaxed exit
Why This 3-Day Mount Baker Climb Feels Like Real Mountaineering Class
If your goal is to “start mountaineering” and not just check a summit box, this Mount Baker plan makes sense. You’ll learn core glacier skills—ice axe arrest, crampon use, rope team basics—then apply them in the environment that makes those skills matter: icefalls, seracs, crevasses, and the constant job of staying aware.
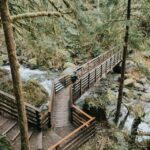
The value here isn’t only that you’ll climb. It’s that the trip is structured like a field course. You’re told upfront that the classroom is the mountain itself: streams, blue ice, and long-distance views toward the Puget Sound, all while you practice do’s and don’ts of alpine travel.
I also like that guides work with you on packing balance. That small detail matters more than people expect. Glacier trips punish both extremes: too much weight slows you down, while leaving the wrong item behind creates real problems in cold conditions.
You can also read our reviews of more tours and experiences in Seattle.

Easton Glacier vs Coleman-Demming: Pick Your Route and Expect Icefall Work
Mount Baker is famous for its ice, and this climb routes you either via the Easton Glacier or the Coleman-Demming route. Both bring the same theme: challenging route-finding through ice terrain—icefalls, seracs, and around large crevasses—where your job is to move carefully and make good calls with your guide.
On a practical level, these routes teach more than “step where you can.” You learn how to read terrain and travel method together: where crampons should bite clean, how to walk efficiently on glacier surfaces, and how rope management supports the whole team. That’s exactly the kind of experience you’ll carry forward if you want to do intermediate climbs later in the Cascades.
The tour also signals that the route isn’t a fixed guarantee in bad weather. Conditions can force a summit-day change or a safe turnaround. If you want certainty at all costs, mountaineering will disappoint you. If you want competence and a safer learning process, this approach fits.
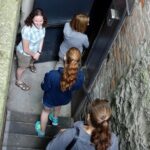
Seattle Morning Logistics: What the Early Start Really Means
You’re starting in the Seattle area with a Park and Ride meet and a start time around 7:30 AM, with pickup details timing you at 8:00 AM. That early schedule is common for big-mountain trips, but it’s worth treating like a planning cue, not an inconvenience.
It means you should plan your day like a climber, not a tourist. Eat and hydrate before the first drive segment, keep your gear organized (so you can access layers fast), and have your mindset ready for a full day of outdoor focus—cold air, early movement, and a lot of time spent learning hands-on techniques.
Also note what’s included and what’s not: transportation isn’t included, but the operator can help arrange carpools (or you may use transportation for extra fees). If you’re coming from out of town, build a little extra buffer into your timing so you don’t end up sprinting to a glacier.
What’s Included (and Why It’s Better Than You Think)
This is where the tour becomes good value for the right kind of climber: much of the expensive complexity is handled for you.
Included items cover all permits, stoves/cook kits, and tents, plus group climbing equipment and guide services. That matters because glacier trips are gear-heavy and permit-heavy. If you had to source everything yourself, you’d spend time shopping, then deal with the stress of whether you picked the correct version of gear for snow and ice travel.
The guides also include pre-trip planning and an information session on packing and gear, plus a gear check at least three days prior to the climb. That early coaching step is the difference between buying gear and actually learning how to carry it.
One more inclusion that’s easy to overlook: Leave No Trace is part of the training. That’s not a vibe statement—it affects how you handle waste, how you set up camp, and how you move responsibly in sensitive alpine environments.
Skills You’ll Practice: Self-Arrest, Crampons, Rope Management, and Knots
The skill list is one of the strongest parts of this experience. The goal isn’t “watch the experts” and hope you pick it up. You practice the foundations that make safer travel possible later.
Here are the key areas the trip explicitly covers:
- Ice axe positions and self-arrest techniques (the core survival skill on steep snow/ice)
- Use of crampons and walking techniques both with and without them
- How to attach to a rope team and manage rope work during travel
- Climbing knots (important because rope systems only work when knots are done correctly)
- Navigation and route finding through complex ice terrain
- Hazard assessment (how you judge danger as conditions change)
- Cold weather camping skills
- Leave No Trace
In plain terms, you’re learning how to move with control. On ice and snow, your feet, your stopping technique, and your rope communication all become part of one system.
A nice detail from the training approach: before summiting, you’re taught the fundamental glacier travel skills needed for safe movement. That sequence is exactly what you want. It reduces the odds that you’ll reach summit terrain without having practiced the motions that stop you from turning a mistake into a major incident.


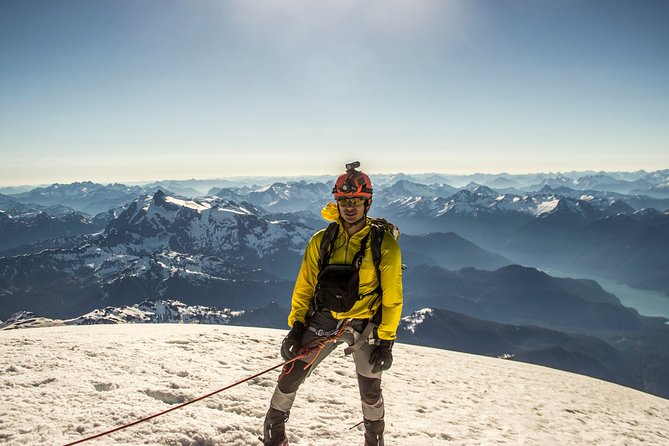
The Summit Window: Icefalls, Seracs, and the Safety Calls That Matter
Mount Baker’s appeal is also the challenge. The routes involve icefalls and seracs, with big crevasse zones that demand careful route selection and teamwork. You’re not just climbing uphill; you’re managing risk while staying efficient enough to keep moving safely.
The operator builds this reality into the trip plan: your summit day may shift. Depending on conditions, the climb might adjust the summit attempt to the second day and sleep in on the third day for a more relaxed hike out. This kind of flexibility is more than a scheduling trick—it’s a safety tool.
Guides on the team—like Josh, Simon, and Caleb—are described as prioritizing safety and making a turnaround call when weather or visibility gets bad. I consider that a feature, not a failure. A summit that costs the group’s safety isn’t a win. The better outcome is reaching a point where you’re prepared for future attempts and you’ve practiced the skills that reduce risk next time.
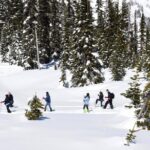
Camping in the Cold: What You Should Expect and How to Prepare
Cold weather camping skills are included, which is a big deal on a winter-heavy mountain like Baker. Even if the trip is only a few nights, you’ll be learning what works for staying functional: managing your layers, organizing gear so you can reach it quickly, and handling the reality of cold temperatures during breaks.
What you don’t get included is the food and hot drinks. Since all meals are not included, you’ll need to plan your own nutrition and warmth strategy. On a glacier trip, warm calories and hydration affect decision-making. If you under-eat, you lose energy for both climbing and learning.
You can also expect that stoves and cook kits are provided, which helps. But it still means you’re responsible for bringing your own meal supplies. If you’re not sure what that looks like, lean on the pre-trip session and gear check, because they’ll help you think through what you actually need.
Gear Checks and Packing Balance: The Practical Secret to Not Suffering
Before the climb, there’s a pre-trip planning session on packing and gear, and a gear check at least three days prior. That’s not “extra.” It’s a smart way to prevent the most common rookie mistakes: bringing too much weight, forgetting an essential item, or packing in a way that makes cold-weather access miserable.
Mountaineering gear checks also help with something you might not think about until you’re on the mountain: how you move when your pack is set up for snow travel. Poor packing choices can cost you time, energy, and comfort—even if you own the right gear.
Because group climbing equipment and tents are included, you’re not trying to solve every gear question alone. You still need your own personal items, and the packing coaching is designed to get you to the right balance.
Who This Tour Suits Best (and Who Should Think Twice)
This trip is described as meant for experienced hikers looking to start mountaineering. That’s a helpful line because it tells you what level you’re expected to bring: you should have the stamina for sustained outdoor effort and you should be comfortable learning technical systems quickly.
If you’re brand-new to rope teams, you might feel overwhelmed at first, but the structure is built for skill-building. The guides are there to teach safe glacier travel fundamentals and how to practice them.
On the other hand, if you’re only looking for a straightforward walk to a view, this is not that. This climb involves glacier travel and the hazards that come with it. You should treat it as a training-and-summit experience, not a casual outing.
Price and Value: What You’re Paying For (Without the Sticker Shock)
You won’t see a stated price here, but the value is still clear from what’s included. A lot of the cost stress on mountain trips comes from things like permits, guide time, and whether you’re bringing the right technical gear. Here, permits, guide services, tents, stoves/cook kits, and group climbing equipment are included.
That means your money is going toward the parts you can’t DIY safely: expert instruction, rope-system guidance, and the logistics that keep the trip moving in real glacier conditions.
You do pay for what’s not included: transportation, meals/hot drinks/snacks, and gratuities. I’d plan for those early so you can judge the full budget without surprises.
A small-group cap (15 participants) also affects value. More personalized supervision often means more feedback on crampon walking, rope technique, and hazard awareness—skills you want to get right.
Should You Book This Mount Baker Climb?
If you want a Mount Baker climb that teaches you real glacier fundamentals—rope teamwork, self-arrest, crampons, navigation, and hazard assessment—this is a strong fit. The inclusion of gear, tents, permits, and guide-led skill practice turns the trip into something you can grow from, not just something you survive.
Book it if:
- You’re an experienced hiker ready to start mountaineering
- You prefer structured learning over guesswork
- You want a safety-first team that will adjust summit plans when conditions demand it
Consider another option if:
- You want meals and transport handled end to end
- You’re not interested in cold-weather camping basics
- You need guaranteed summit weather certainty (mountains don’t do that)
Either way, go in with the right mindset: flexible on timing, serious about technique, and ready to learn by doing.
FAQ
How long is the Mount Baker climb tour?
The tour runs for 3 days (approx.).
Which routes does the tour use on Mount Baker?
The climb uses either the Easton Glacier route or the Coleman-Demming route.
What skills are included during the climb?
You’ll learn ice axe positions and self-arrest techniques, crampon use and walking techniques, climbing knots, glacier travel skills and rope management, navigation and route finding, hazard assessment, cold weather camping skills, and Leave No Trace.
What’s included in the price?
Included items are all permits, stoves/cook kits, tents, group climbing equipment, guide services, and pre-trip planning/information on packing & gear. Backpacking, mountaineering, and general outdoor safety skills are also included.
What isn’t included?
Transportation is not included, and meals, hot drinks, and snacks are not included. Gratuities for guides are not included.
What’s the maximum group size?
Group sizes are capped at 15 travelers.
What happens if weather changes during the trip?
Depending on weather conditions, the summit day may shift to the second day of the itinerary, with a sleep-in on the third day for a more relaxed hike out. Other changes may also happen due to unsafe route conditions or other factors beyond control.